Note: If your replacement battery has a thin plastic film, do not remove it. This film is glued on and Serves to protect the battery pack while inside the MacBook
Step 1
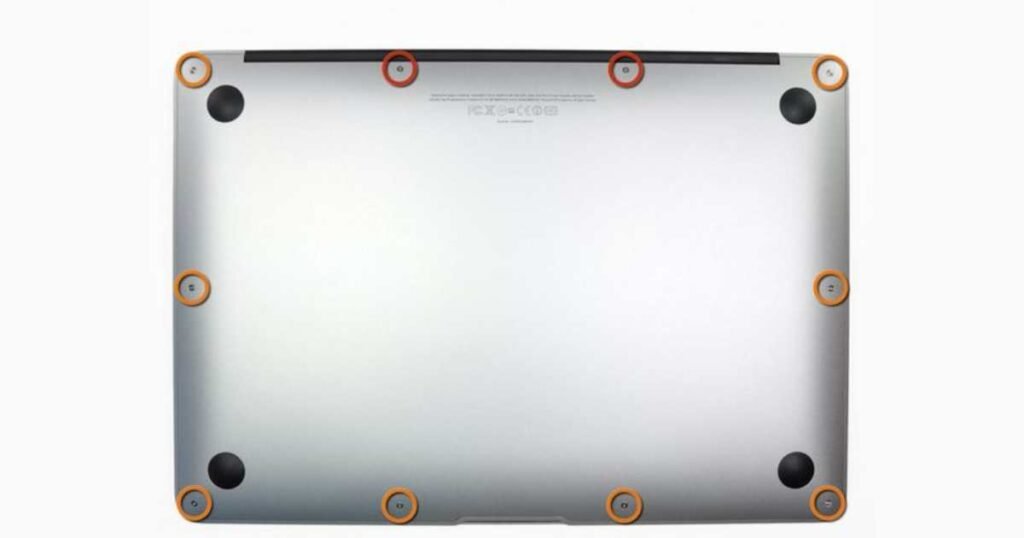
Before you begin, power down your MacBook. Close the display and place it on a soft surface with the top side facing down.
Using a P5 Pentalobe driver, remove the ten screws securing the lower case. These screws are of the following lengths:
Two 9 mm screws
Eight 2.6 mm screws
Step 2
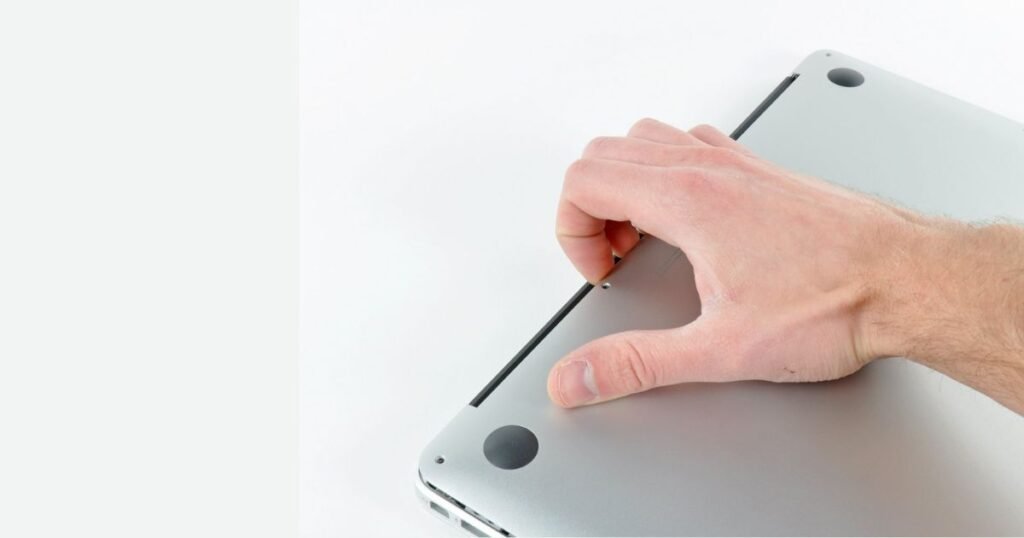
Place your fingers between the display and the lower case, then pull upward to detach the lower case from the Air.
Remove the lower case and set it aside
Step 3
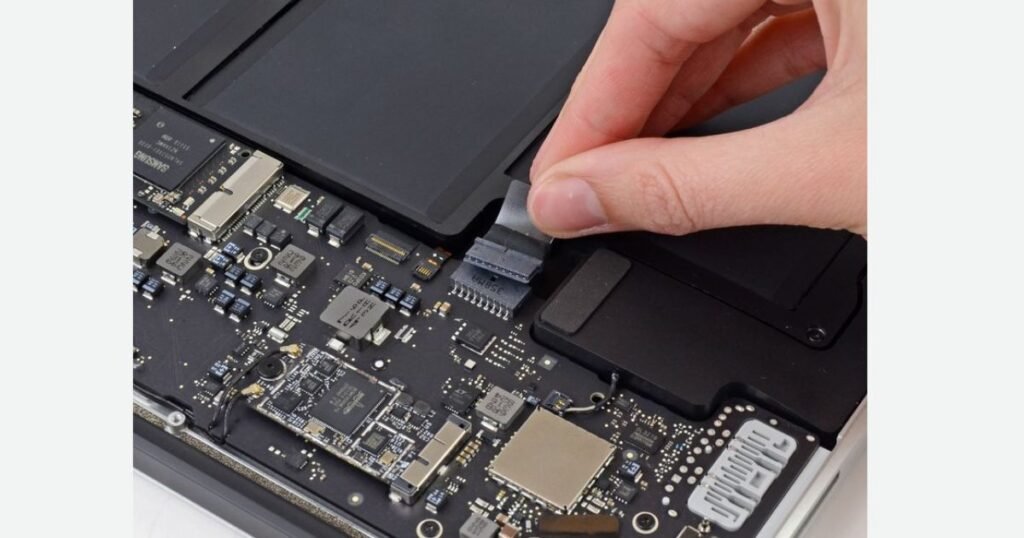
Grap the clear plastic pull tab attached to the battery connector and pull it towards the front edge of the Air to disconnect the battery from the logic board.
Avoid lifting the connector upward while disconnecting it.
Step 4
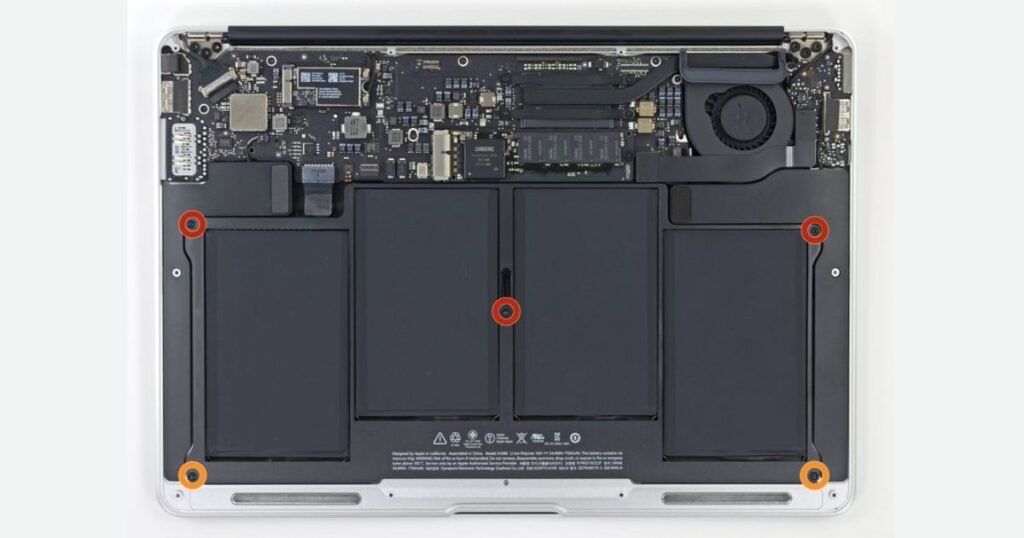
Remove the following five screws securing the battery to the upper case:
Three 6.3 mm T5 Torx screws
Two 2.4 mm T5 Torx screws
Step 5
When handling the battery, avoid squeezing or touching the four exposed lithium polymer cells.
Lift the battery from the edge nearest the logic board and remove it from the upper case.
If you’re installing a new battery, you should calibrate it after installation:
Charge it to 100%, then keep charging for at least 2 more hours.
Unplug and use it normally to drain the battery.
When you see the low battery warning, save your work and keep your laptop on until it goes to sleep due to low battery.
Wait at least 5 hours, then charge your laptop uninterrupted to 100%.
Share your love
Latest Blogs Updates
Enter your email address below and subscribe to our latest Blogs